Nightfall Documentation
  • Data Detection and Response
  • Posture Management
  • Data Exfiltration Prevention
  • Data Encryption
  • Firewall for AI
  • Data Classification and Discovery
  • Welcome
  • Introduction to Firewall for AI
    • Overview
    • Quickstart
    • Use Cases
    • Authentication and Security
  • Key Concepts
    • Entities and Terms to Know
    • Setting Up Nightfall
      • Creating API Key
      • Creating Detectors
      • Creating Detection Rules
      • Creating Policies
    • Alerting
    • Scanning Text
    • Scanning Files
      • Supported File Types
      • File Scanning and Webhooks
      • Uploading and Scanning API Calls
      • Special File Types
      • Specialized File Detectors
      • Webhooks and Asynchronous Notifications
        • Accessing Your Webhook Signing Key
        • Creating a Webhook Server
    • Scanning Features
      • Using Pre-Configured Detection Rules
        • Scanning Images for patterns using Custom Regex Detectors
      • Creating an Inline Detection Rule
      • Using Exclusion Rules
      • Using Context Rules
      • Using Redaction
      • Using Policies to Send Alerts
      • Detecting Secrets
      • PHI Detection Rules
    • Detector Glossary
    • Test Datasets
    • Errors
    • Nightfall Playground
  • Nightfall APIs
    • DLP APIs - Firewall for AI Platform
      • Rate Limits for Firewall APIs
    • DLP APIs - Native SaaS Apps
      • Policy User Scope Update API
      • Rate Limits for Native SaaS app APIs
  • Exfiltration Prevention APIs
    • Default
    • Models
  • Posture Management APIs
    • Default
    • Models
  • Nightfall Software Development Kit (SDK)
    • Overview
    • Java SDK
    • Python SDK
    • Go SDK
    • Node.JS SDK
  • Language Specific Guides
    • Overview
    • Python
    • Ruby
    • Java
  • Tutorials
    • GenAI Protection
      • OpenAI Prompt Sanitization Tutorial
      • Anthropic Prompt Sanitization Tutorial
      • LangChain Prompt Sanitization Tutorial
    • SaaS Protection
      • HubSpot DLP Tutorial
      • Zendesk DLP Tutorial
    • Observability Protection
      • Datadog DLP Tutorial
      • New Relic DLP Tutorial
    • Datastore Protection
      • Airtable DLP Tutorial
      • Amazon Kinesis DLP Tutorial
      • Amazon RDS DLP Tutorial
      • Amazon RDS DLP Tutorial - Full Scan
      • Amazon S3 DLP Tutorial
      • Elasticsearch DLP Tutorial
      • Snowflake DLP Tutorial
  • Nightfall Use Cases
    • Overview
    • GenAI Content Filtering-How to prevent exposure of sensitive data
    • Redacting Sensitive Data in 4 Lines of Code
    • Detecting Sensitive Data in SMS Automations
    • Building Endpoint DLP to Detect PII on Your Machine in Real-Time
    • Deploy a File Scanner for Sensitive Data in 40 Lines of Code
    • Using Scan API (with Python)
  • FAQs
    • What Can I do with the Firewall for AI
    • How quickly can I get started with Firewall for AI?
    • What types of data can I scan with API?
    • What types of detectors are supported out of the box?
    • Can I customize or bring my own detectors?
    • What is the pricing model?
    • How do I know my data is secure?
    • How do I get in touch with you?
    • Can I test out the detection and my own detection rules before writing any code?
    • How does Nightfall support custom data types?
    • How does Nightfall's Firewall for AI differs from other solutions?
  • Nightfall Playground
  • Login to Nightfall
  • Contact Us
Powered by GitBook
On this page

Was this helpful?

Export as PDF
  1. Key Concepts
  2. Setting Up Nightfall

Creating Detection Rules

PreviousCreating DetectorsNextCreating Policies

Last updated 10 months ago

Was this helpful?

You can define Detection Rules “inline” in the body of each request to the scan endpoint. See the example in the walk through of the scan endpoint Creating an Inline Detection Rule.

You can also use the > to predefine your Detection Rules. Once you have created a Detection Rule, you will receive a UUID, which you can pass in as part of your API request payloads.

You may add up to 50 detectors to your detection rule.

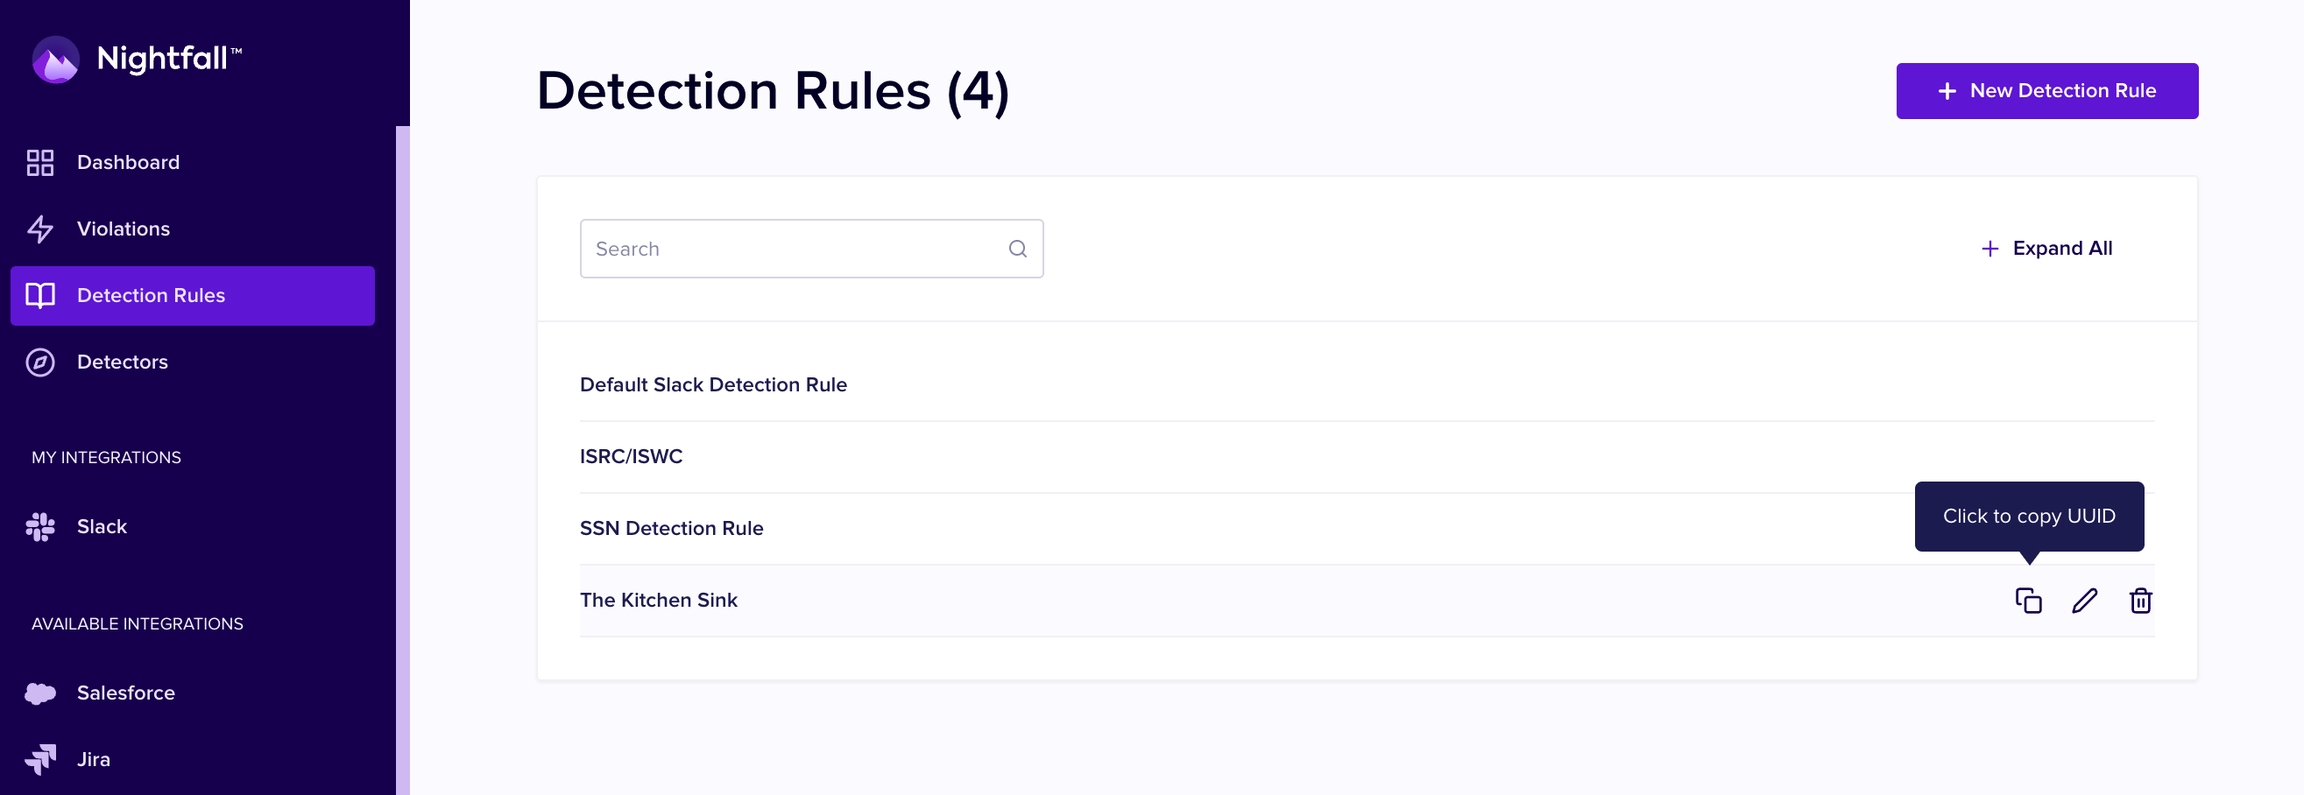
To create a Detection Rule in the Nightfall UI, Select "Detection Rules" from the left hand navigation.

Click the + New Detection Rule button in the upper right hand corner.
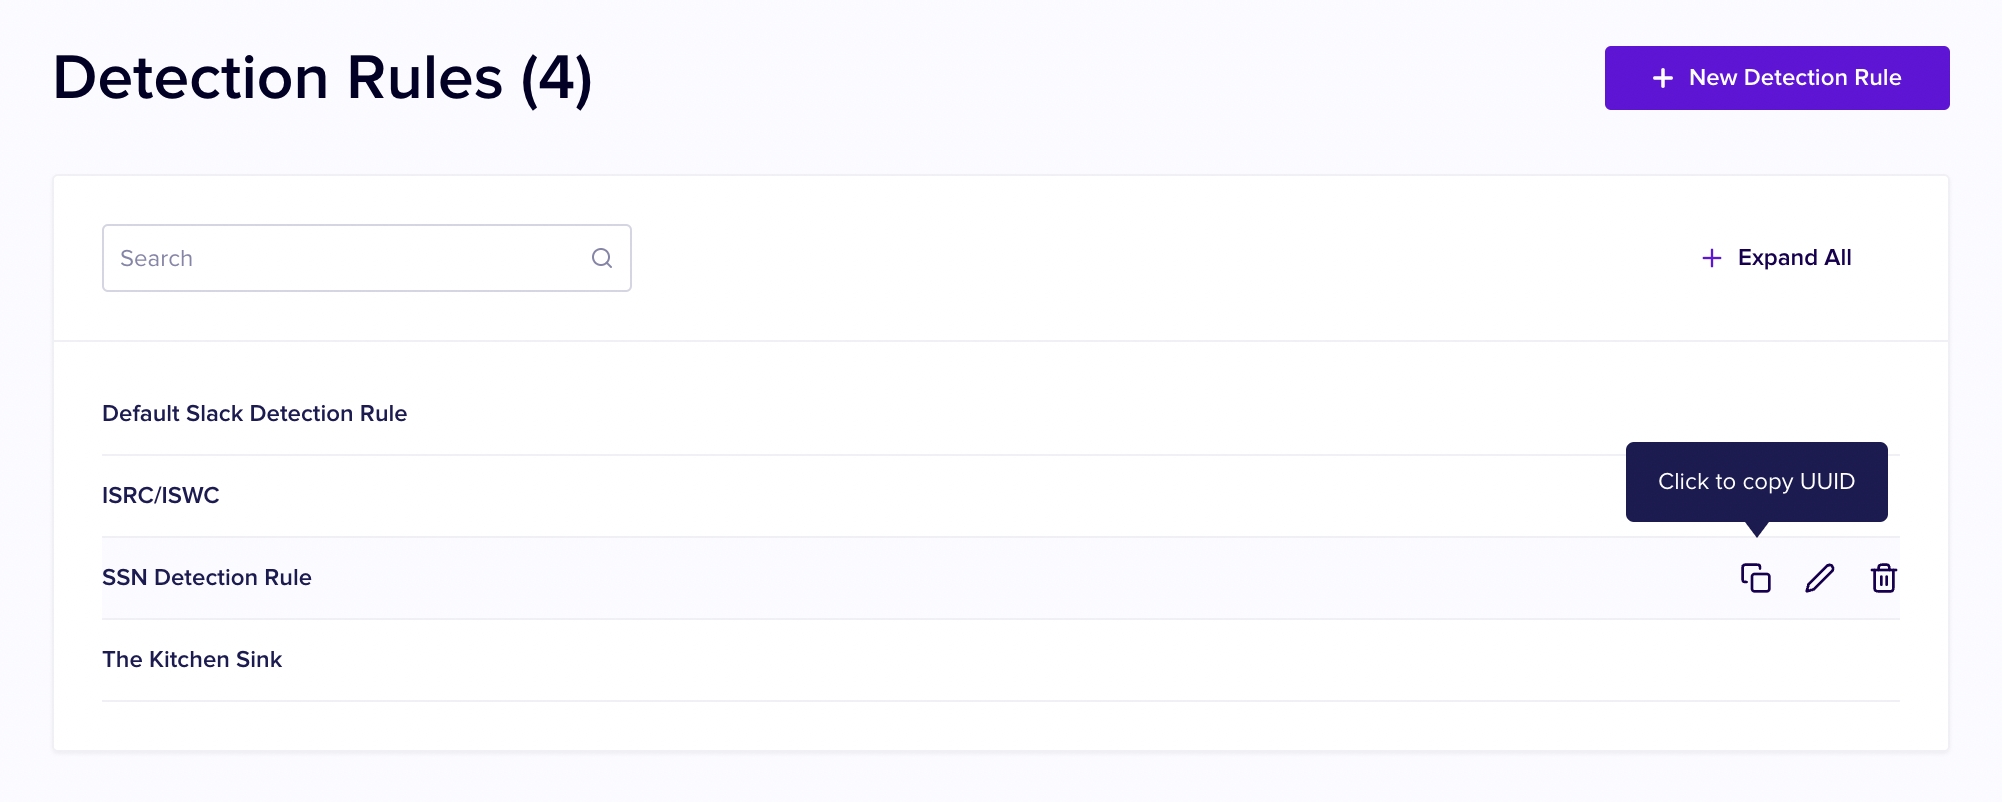
The Nightfall Detection Rules page

First, enter a name for your Detection Rule as well as an optional description.
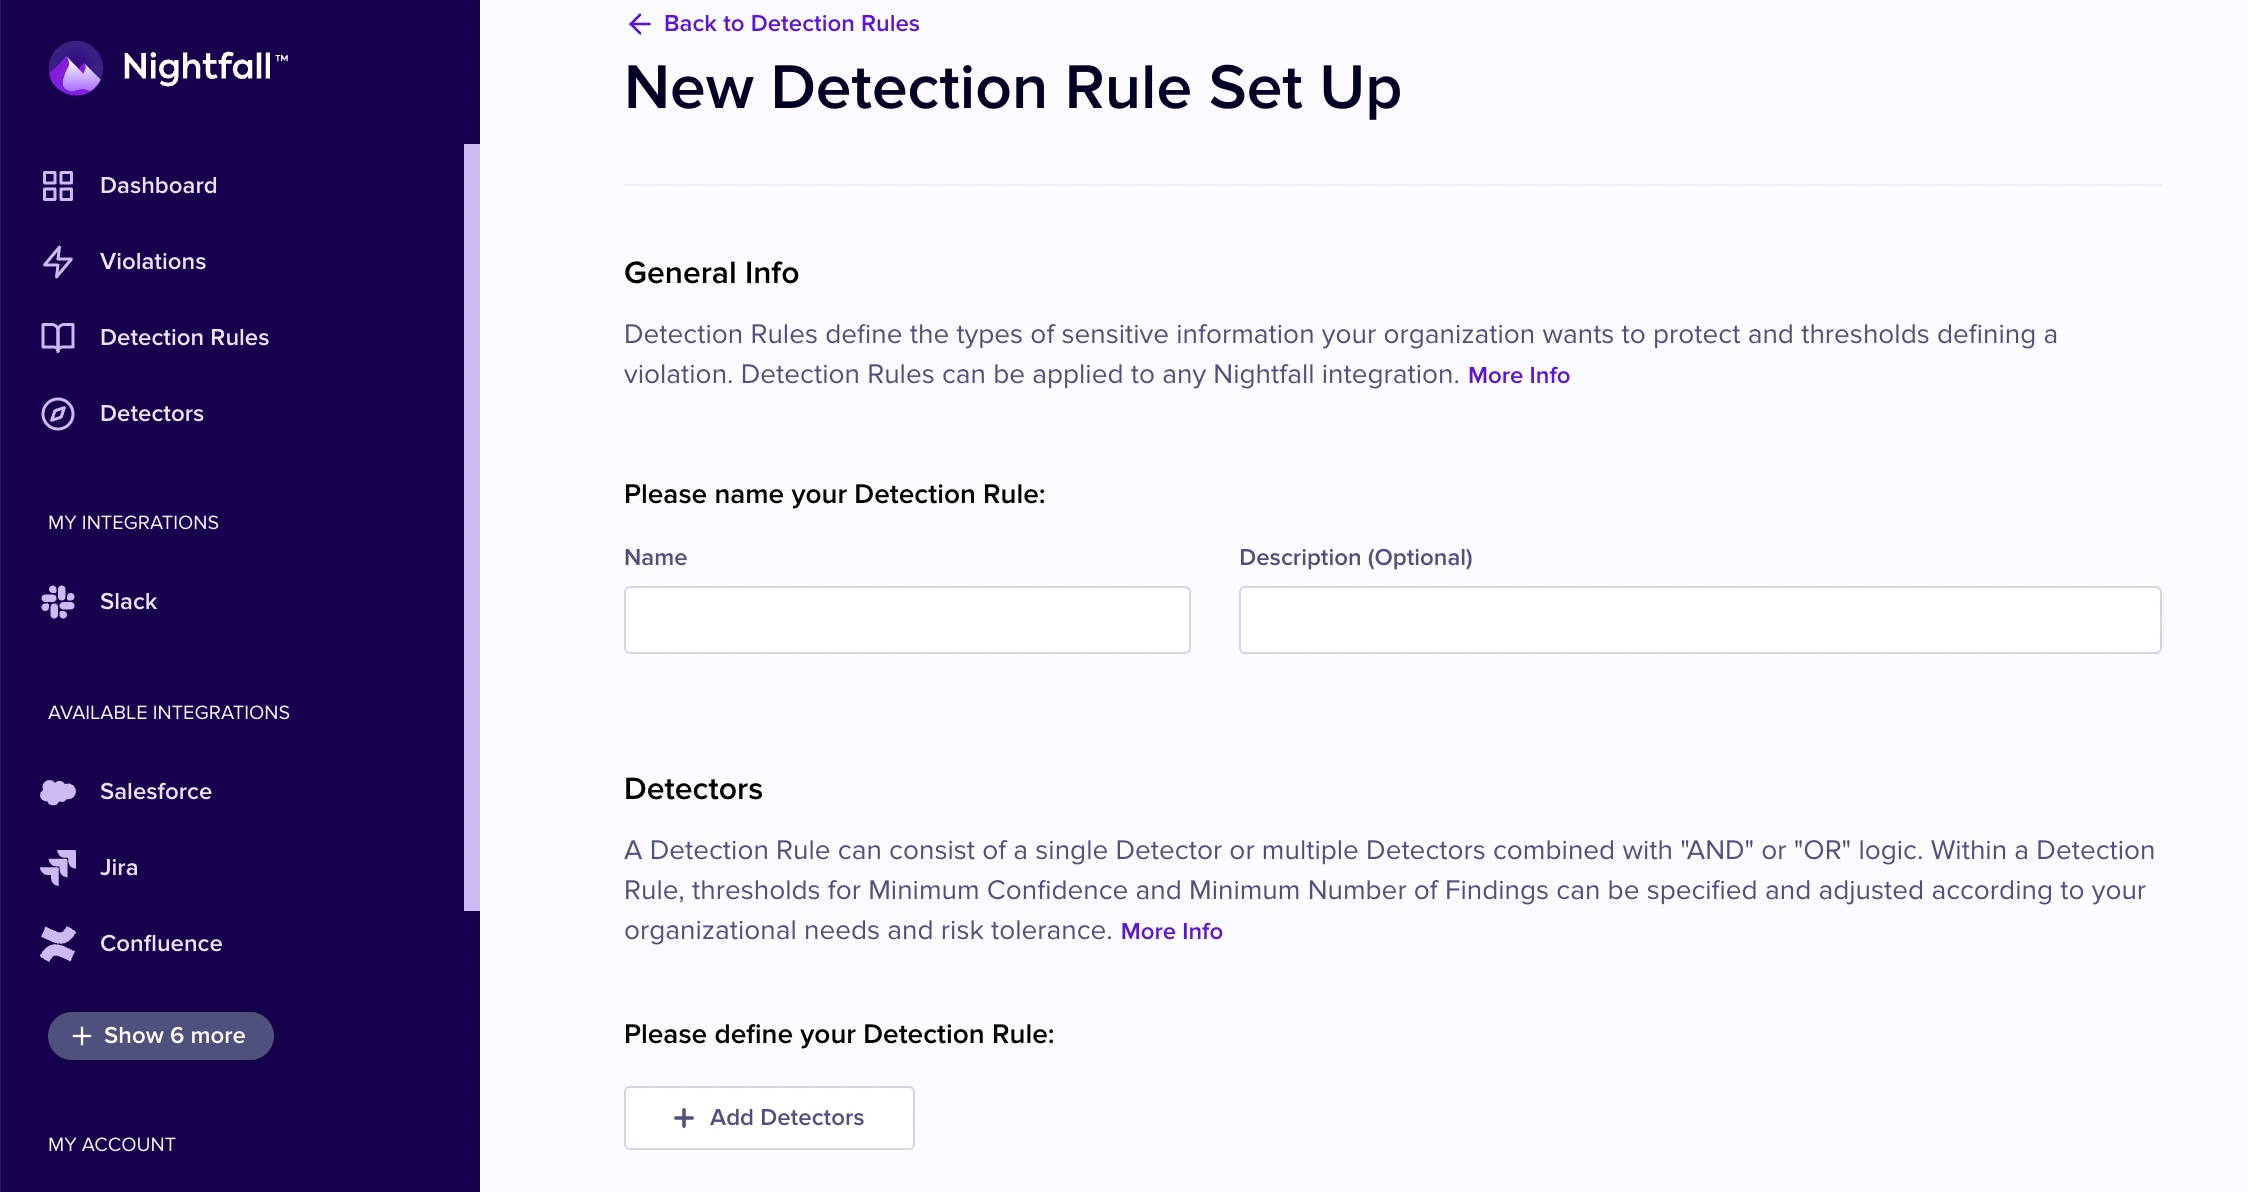
Then click the + Detectors button to add Detectors to your Detection Rule.
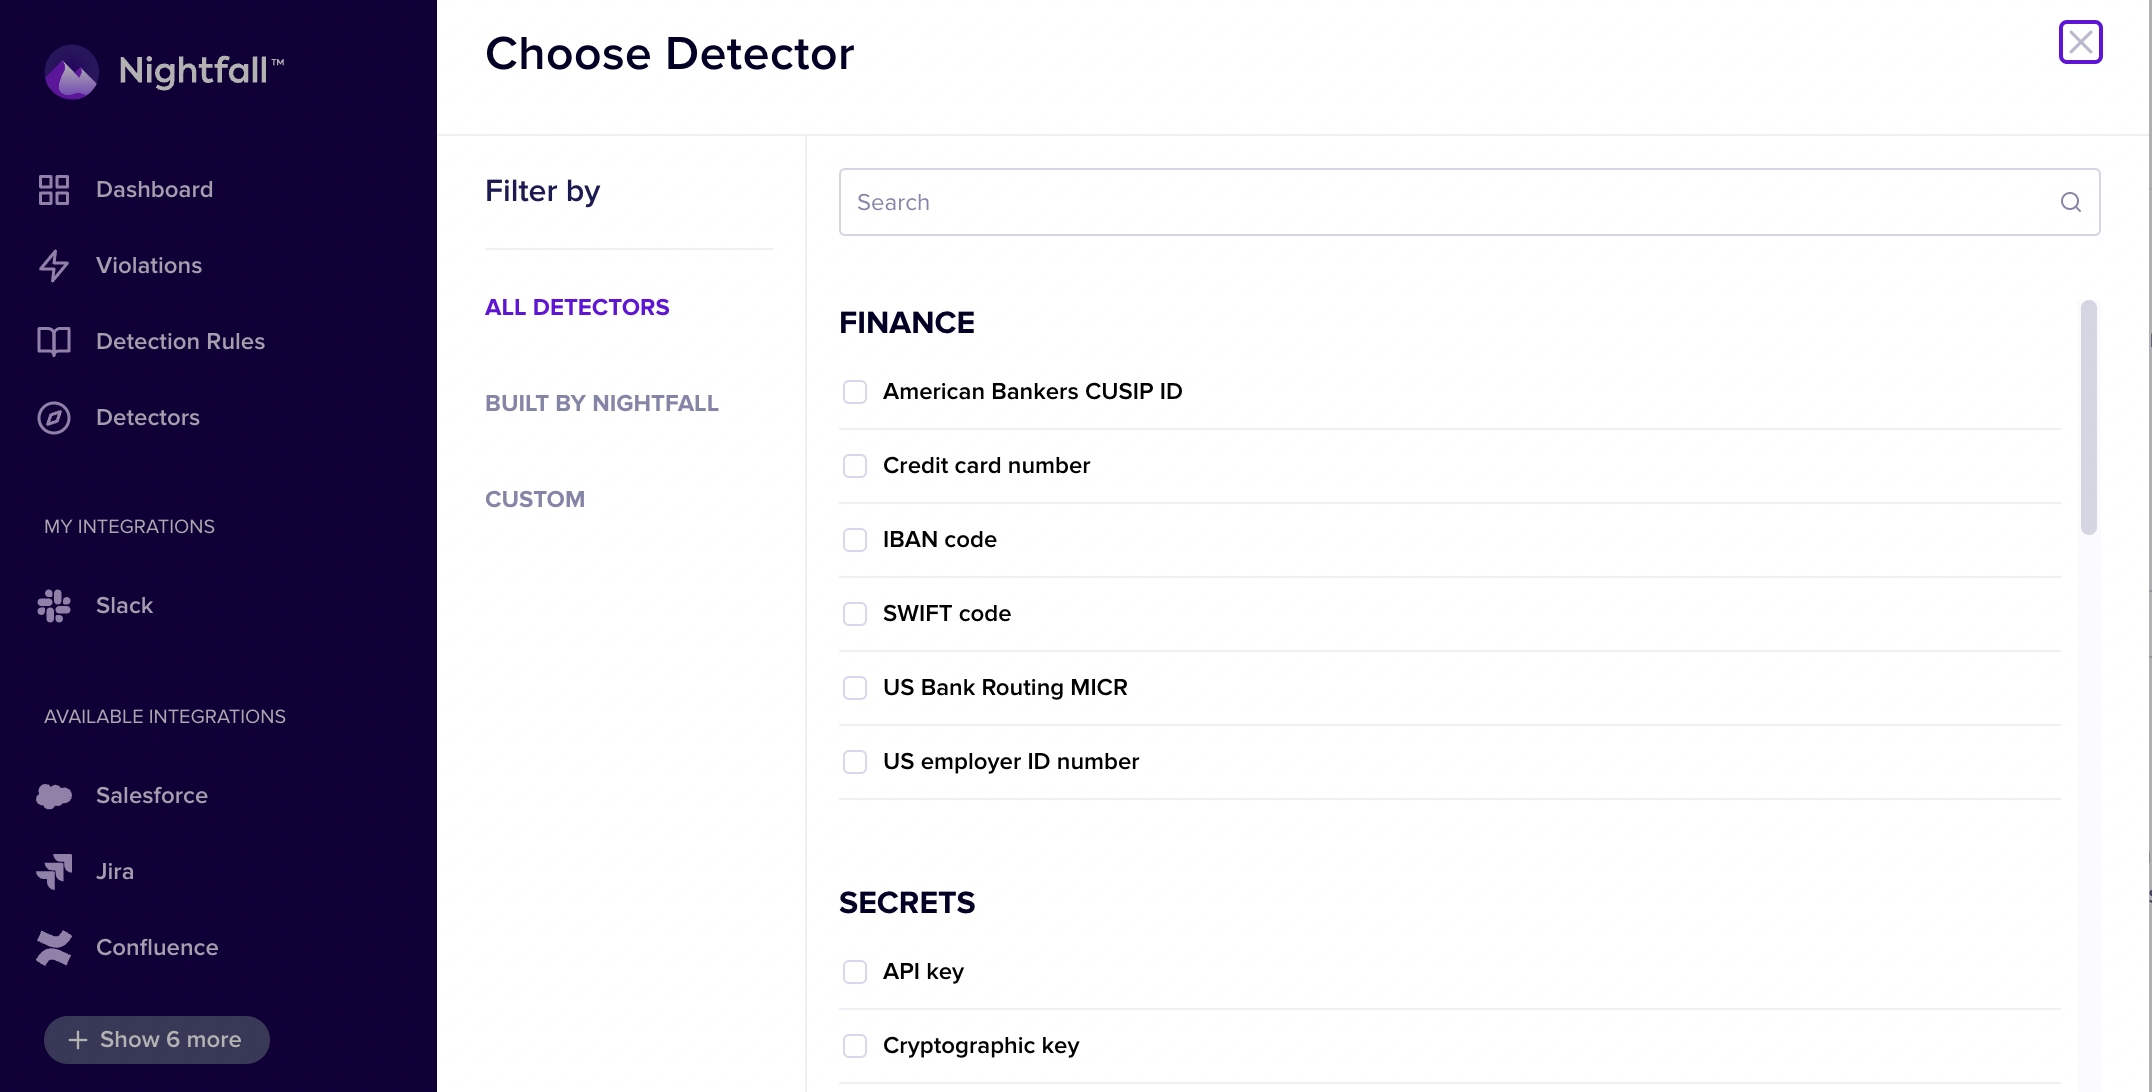
In this example we have selected the US drivers license and Canada Government ID detectors.

Click the Add button in the lower right hand corner at the end of the detector list when you are done adding detectors.

Now that your Detectors are set, choose a minimum confidence level and a minimum # of findings for each detector.

If these minimums for a Detector are not met, the Detection Rule will not be triggered.
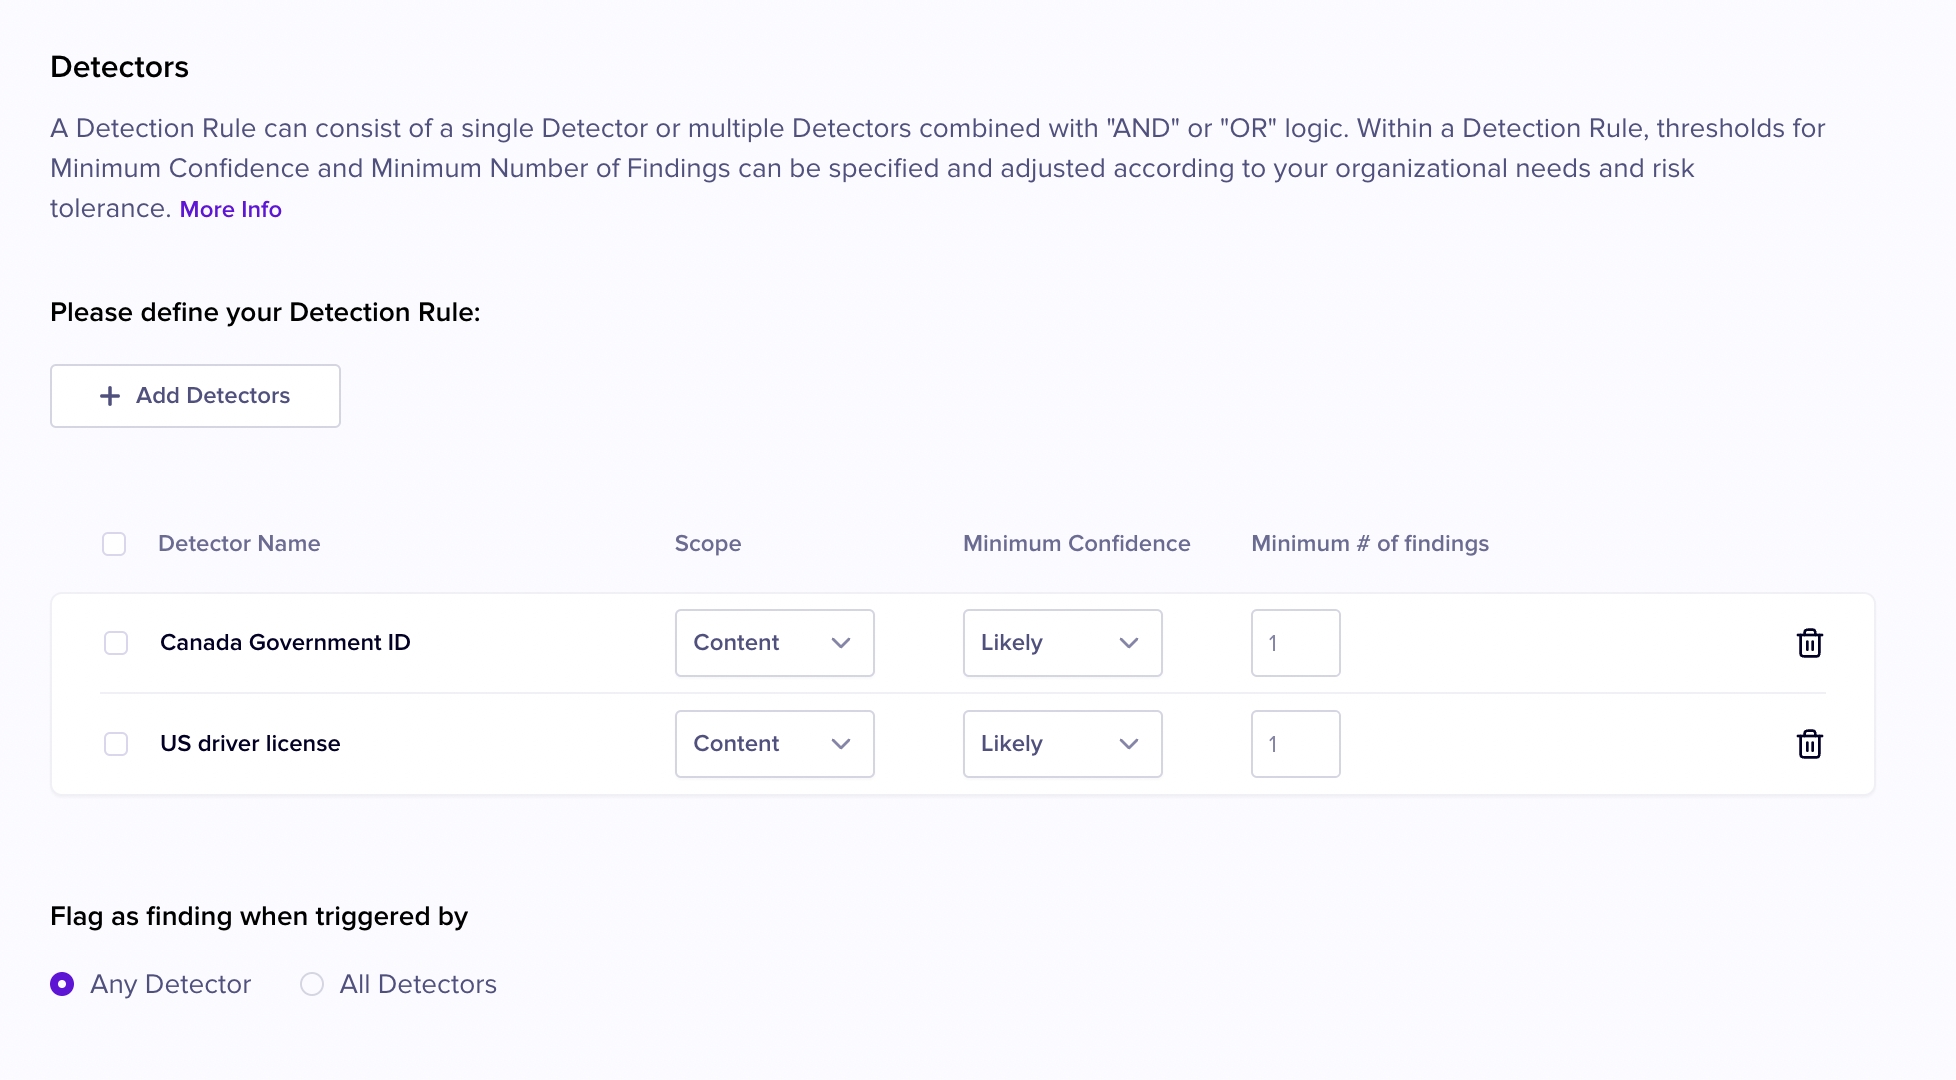
Save your Detection Rule in the lower left hand corner once you are done.

Once the Detection Rule is saved, it is available for use in requests to the Nightfall API to scan your data for sensitive information. Pass in the UUID of the Detection Rule as the detectionRuleUUIDs field of your requests to the the scan endpoints.

The UUID may be obtained by clicking the "copy" icon, the left most icon in the set of icons that appear next to the Detection Rules name when your cursor highlights a Detection Rule in the list of Detection Rules.

See Using Pre-Configured Detection Rules for an example of using a Detection Rule UUID.

Creating a New Detection Rule
Selecting Detectors for a Detection Rule
Setting confidence levels and minimum findings for a Detection Rule
Copying a UUID for a Detection Rule
Nightfall UI
Detection Rules
Creating a New Detection Rule
Setting confidence levels and minimum findings for a Detection Rule
The Nightfall Detection Rules page
Selecting Detectors for a Detection Rule
Copying a UUID for a Detection Rule